I captured 60 DV tapes in 2020. Here’s how I did it.
Nov 24, 2020
Minor updates Feb 25, 2023
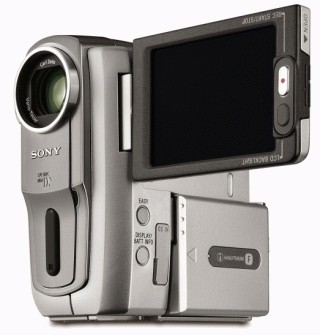
I bought my first camera in 2004, a Sony DCR PC-109E. I still know the name by heart because I was so excited to get it. It was the first real expensive thing I ever bought for my own money that I had saved up from dubbing the whole summer break.
It was actually an amazing piece of tech for its time. It fit in my palm, battery time was decent and it had both night vision and a touch screen. It was so simple, just put a tape in, start it and record. I used it to create silly short films, recording family vacations and I even got some gigs recording stage plays. Getting a camera was a defining moment in my teens and I loved filmmaking.
A while back my in-laws asked me how they could put their old DV tapes onto DVDs. My first thought was “why would you want to transfer a legacy format to another legacy format, you don’t even have a DVD player anymore”. But I told them that there’s got to be some company in their home town that could do it for them. They found one but were pretty disappointed when the guy wanted more than 150 kr per tape and they had around 40 of them.
I thought, well it can’t be that hard can it? I used to do it all the time way back. Well I was wrong… Here’s my process of how I captured 60 DV tapes (40 were my in-laws, 20 my own).
About DV
The data from a tape is digital but not in the same way as a file on a disk or on a USB-stick. When the tape is played back the “head” inside the camera will read the data and show it in real time. It’s the same way VHS players work just in a much smaller scale.
To get the maximum resolution (480p) we need to capture the data stream, and the only way to do that back in 2004 was through FireWire, also known as IEEE 1394 (just rolls off the tongue). At the time FireWire was the interface most cameras and audio equipment used for communicating with a computer. USB and FireWire are not compatible.
Hardware
I started with dusting off my old camera which I found in a box in the basement. The battery was dead but all the mechanical parts seemed intact. With the power cord plugged in I popped in a tape and it actually worked! I’m still impressed by this little camera.
My old MacBook had a FireWire 800 port and after getting an adapter (FireWire 400 mini to 800) I spent a whole day trying to get it to connect to the computer to no avail. I tried switching cables, but it seems that the camera’s FireWire port was dead. I kind of expected it but still it bummed me out a little bit.
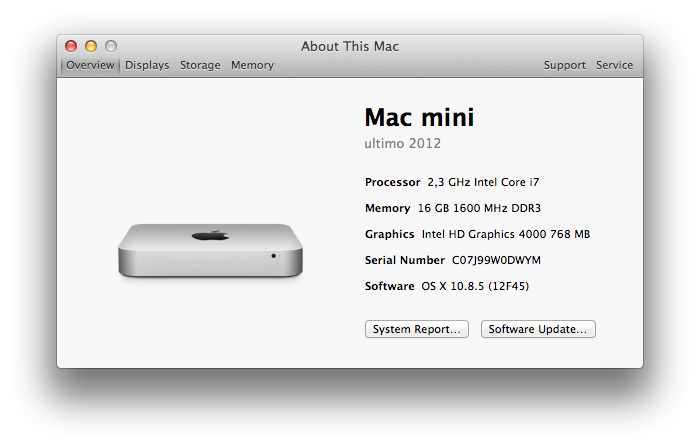
At the time I was working at a company which has a whole warehouse full of old and new tech and I after some scavenging in the forgotten areas I found an old (actually broadcast grade-) HDV camera that could play DV tapes. I also found an old Mac Mini running OSX Lion which was perfect since the option to capture FireWire streams have been removed long ago.
Software
Back when I did my goofy short films I used Final Cut Pro 7 to capture and edit. It worked great. After going to film school I was sold on Avid Media Composer 5.5 and thought that in order to become a professional I had to use it. None of those programs are available today so I scoured the web on how to import tapes without those.
Many suggested using iMovie. It was installed on the Mac Mini so I had a go. It didn’t work as expected and it often chopped up the tapes into smaller chunks. I also found it extremely slow when exporting so I carried on. I spent almost a whole day here to find software that was good enough and would work on a 10 year old computer.
Turns out all you need is QuickTime! By selecting File -> New Recording the camera would show up as a source just like a webcam. My process was then to hit play on the camera then start the recording in QuickTime and carry on with other stuff as the tape was captured. QuickTime stores the file in a mp4 container and even de-interlaces the video as it goes along.
Capturing
This process is far from flawless though. If QuickTime finds a break in the timecode it will stop the recording (but the camera will continue playing). Turns out my in-laws often shot things and then rewinded the tape to look at it. Then when they would record something new they left a gap between the previous recording and the new one.
Therefore I periodically had to check if it was even recording and if it wasn’t, rewind back and find the black gap and restart from there. On top of that for some reason QuickTime would sometimes lose the connection to the camera (?) and the only way to start recording again was to restart the camera and QuickTime. As if it wasn’t tedious enough…
Another thing that also was very annoying is that there’s significant quality issues between the tapes. Almost all the tapes that weren’t Sony’s Premium brand had either distorted audio or banding; vertical lagging between frames. Not much I can do about it but still annoying.
After weeks of capturing tapes I’m finally down to 5 left. I’ll probably transfer the files to a USB stick that my in-laws can just insert in their TV. It’ll be a good Christmas gift.
Guide on how to capture DV tapes
- Get a camera with a functioning FireWire port that plays DV tapes
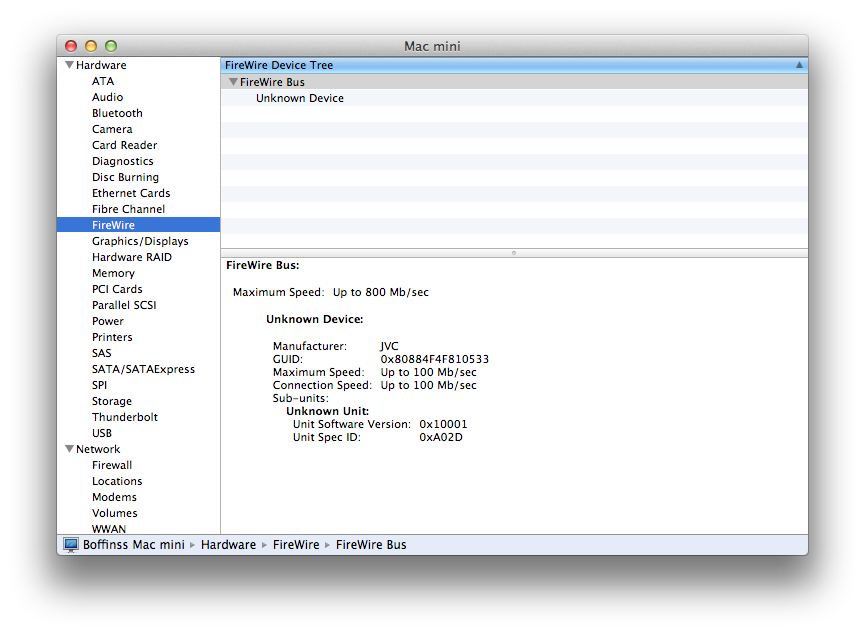
- Make sure you can connect to the camera using FireWire (an adapter can work, an old Mac is better). See image below on what it should look like when they’re connected.
I used a Mac mini running OS X Lion with a FireWire 800 to 400 micro cable to a JVC camera. - Set the camera in VTR mode
- Open QuickTime
- Go to
File -> New recording - On the little dropdown arrow to the right your camera should be listed as a source
- Hit play on the camera and then record in QuickTime
- When you’re done, stop the recording. You can play back the clip.
- Save the file. It will take a few minutes to export.
The computer I use to transfer DV tapes
What it should look like when FireWire is connected
Troubleshooting
Camera won’t show up as a source. Try one of the following.
- Make sure the camera is in VTR mode
- Make sure the camera is allowed to use firewire (should be a setting in the camera’s menu)
- Check that the computer has recognised it as a source. Go to (apple menu) -> About this Mac -> System Report and scroll down to FireWire.
- Restart the camera
- Unplug the camera and restart the computer
About sources in QuickTime You can actually capture the screen of an iPhone using the same trick!